

The New Forest, with its ancient woodlands, wild ponies, and free-roaming deer, offers photographers an extraordinary canvas that changes with every season. During a recent autumn visit, I explored three remarkable locations that showcase the diversity of this Hampshire treasure: Bolderwood Deer Sanctuary, the historic Knightwood Oak, and the magnificent Tall Trees Trail at Blackwater Woods. This photography blog shares the techniques, challenges, and lessons learned from capturing the forest’s unique character during this golden season.
Starting the Journey: Bolderwood Deer Sanctuary and the Radnor Trail
Location Overview
Bolderwood is renowned for its purpose-built viewing platform overlooking meadows where fallow deer regularly gather. While deer viewing isn’t guaranteed, the area’s Ancient and Ornamental Woodland features some of the tallest trees in the New Forest, including Douglas Firs and Redwoods amongst native beech and oak. The Radnor Trail winds through this spectacular woodland, offering numerous photographic opportunities even when the deer remain elusive.
The Challenge: Photographing New Forest Ponies
While we didn’t encounter deer in the sanctuary itself, the surrounding heathland rewarded us with sightings of the New Forest’s iconic free-roaming ponies. Approximately 5,000 ponies roam the forest, owned by local “commoners” who exercise ancient grazing rights dating back to William the Conqueror.
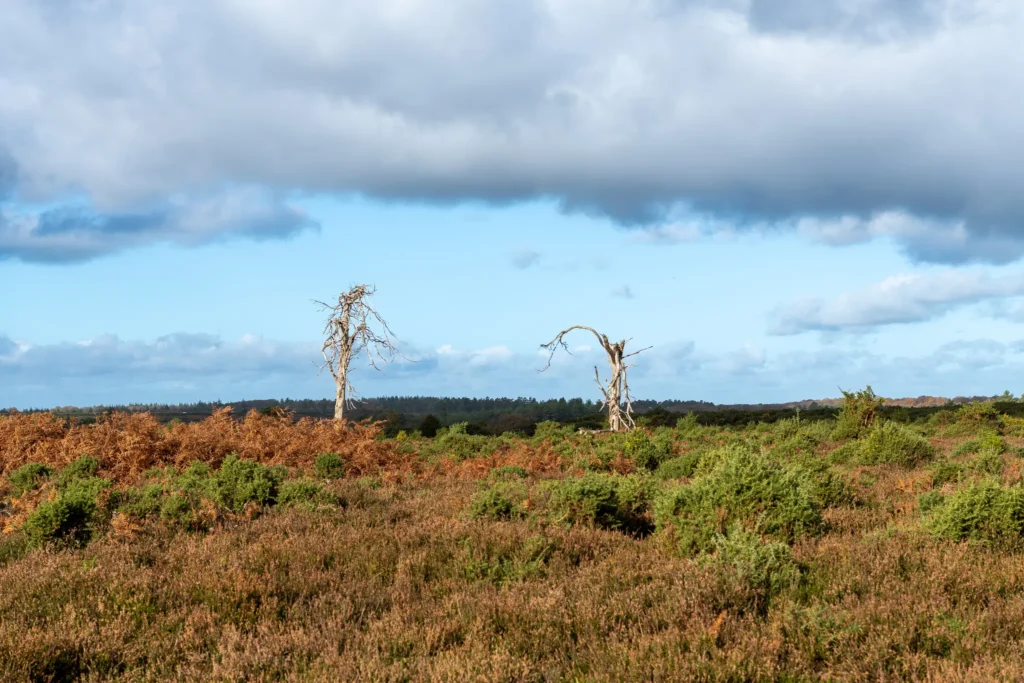
This first image captures the atmospheric heathland just outside the sanctuary, showcasing the mix of golden autumn bracken and evergreen conifers that define this landscape. The composition demonstrates an important principle: context matters in wildlife photography. Rather than isolating the subject completely, including the environment tells a more complete story about where these animals live.
Photography Technique: Capturing Action
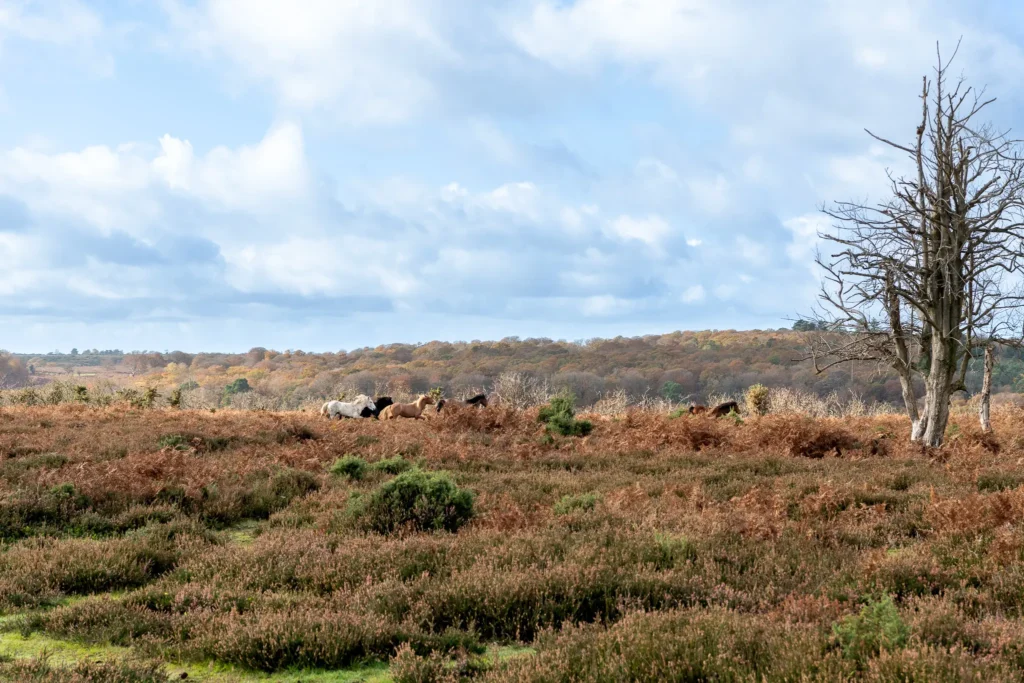
The next photograph presented an exciting challenge – photographing galloping horses. Action photography requires specific technical approaches:
- Shutter speed is critical: For freezing motion of galloping animals, aim for at least 1/1000th of a second, preferably 1/1500th or faster. This prevents motion blur and captures sharp details even in fast-moving subjects.
- Continuous autofocus (AF-C/AI Servo): Switch from single-shot to continuous focus mode to track moving subjects. Modern cameras with animal eye-detection make this easier, but traditional dynamic-area AF works excellently for DSLR users.
- Anticipate the action: Wildlife photography demands patience and observation. Watch the animals’ behavior patterns – ponies often move in groups, so positioning yourself where they’re likely to cross gives you better opportunities.
- Backlighting for drama: The rim-lit silhouettes create stunning effects with New Forest ponies. Position yourself with the sun behind but slightly to the side of your subject to avoid direct sun flare while creating that magical golden outline.
The Importance of Patience and Timing
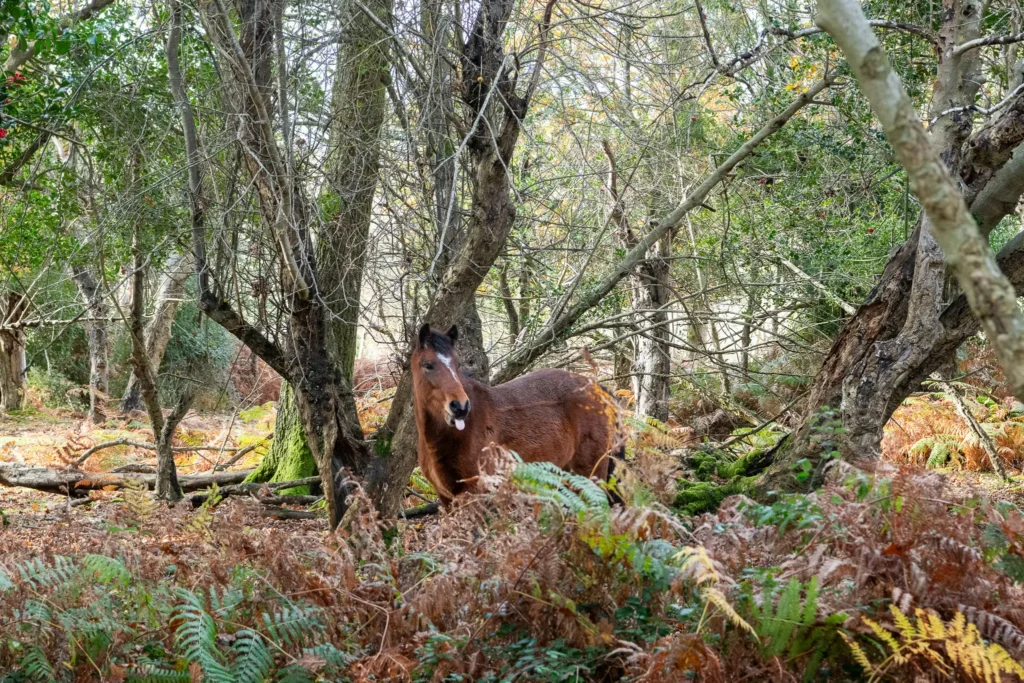
This delightful shot of a pony with its tongue out exemplifies why patience is the wildlife photographer’s greatest asset. Humorous, candid moments like this cannot be planned – they emerge from spending time observing your subjects and being ready to capture unexpected behavior.
Technical Tips:
- Keep your camera ready with settings pre-configured. In woodland environments with variable light, I recommend starting with aperture priority mode (f/5.6-f/8 for wildlife in context) and auto-ISO to maintain your desired shutter speed.
- Use burst mode for behavioral shots. Animals move quickly, and having several frames increases your chances of catching peak moments.
- Focus on the eyes. Even in a humorous shot like this, the sharp focus on the pony’s eye creates connection and impact.
Inside Bolderwood Deer Sanctuary
These next two photos capture the open heathland and striking dead trees within the sanctuary itself.
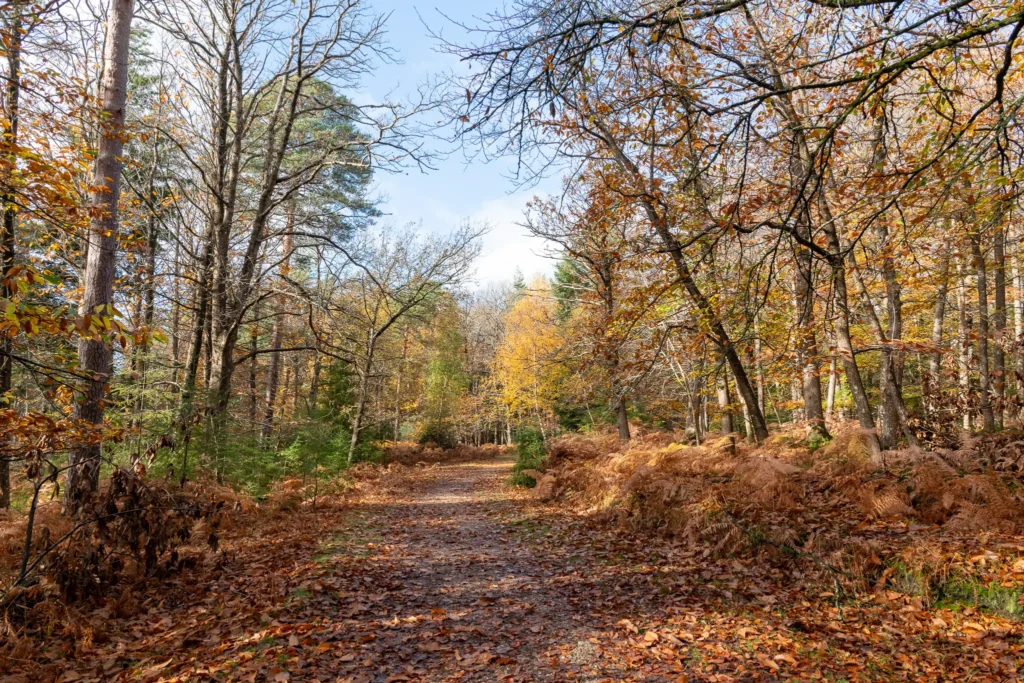
These images demonstrate important landscape photography composition principles:
Working with “Ugly” Elements:
The bare, skeletal trees might initially seem like eyesores, but they provide powerful compositional anchors. In the top photo, the dead trees frame the distant heathland and forest, creating depth through layers – foreground, midground, and background. This layering is essential in woodland photography.
Exposure Considerations in High-Contrast Scenes:
Autumn heathland presents exposure challenges with bright skies, golden bracken, and darker woodland areas. Key techniques include:
- Check your histogram: Heathland scenes with bright vegetation can fool your meter. Ensure highlights aren’t clipped while maintaining detail in shadows.
- Slight underexposure for color saturation: When photographing autumn colors, underexposing by 1/3 to 2/3 stop increases saturation and contrast, making colors more dramatic.
- Graduated neutral density filters: For scenes with very bright skies, these filters help balance exposure between land and sky.
Macro Moments: Holly Berries
This next photograph shifts focus to intimate details – vibrant red holly berries against glossy green leaves.
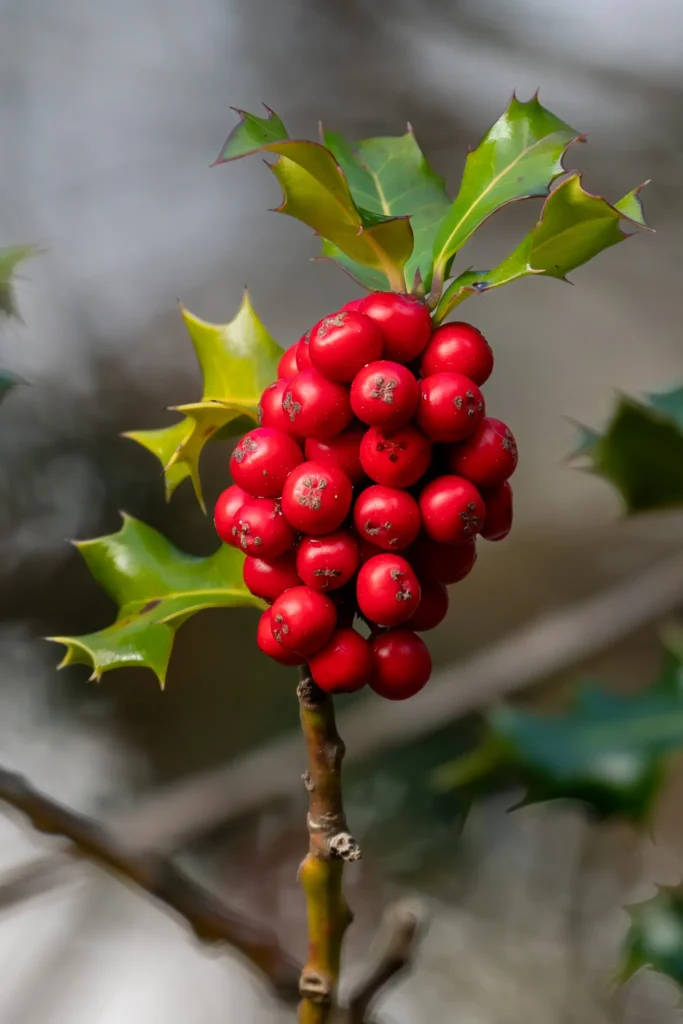
Macro and close-up photography requires different techniques:
Technical Approach:
- Wide aperture for subject isolation: Using f/2.8-f/5.6 creates that beautiful bokeh (blurred background) that makes the berries pop.
- Focus precisely: With shallow depth of field, focusing becomes critical. Focus on the nearest berries to ensure sharpness where it matters most.
- Manage depth of field carefully: Too wide an aperture (f/1.8-f/2) might leave parts of your subject soft. Test different apertures to find the balance between background blur and subject sharpness.
- Backlight for glow: Position yourself so the light illuminates the translucent berries from behind, creating a luminous quality.
Wild Horse in the Brush
This atmospheric shot of a grey pony emerging from holly bushes and ferns showcases environmental portraiture.
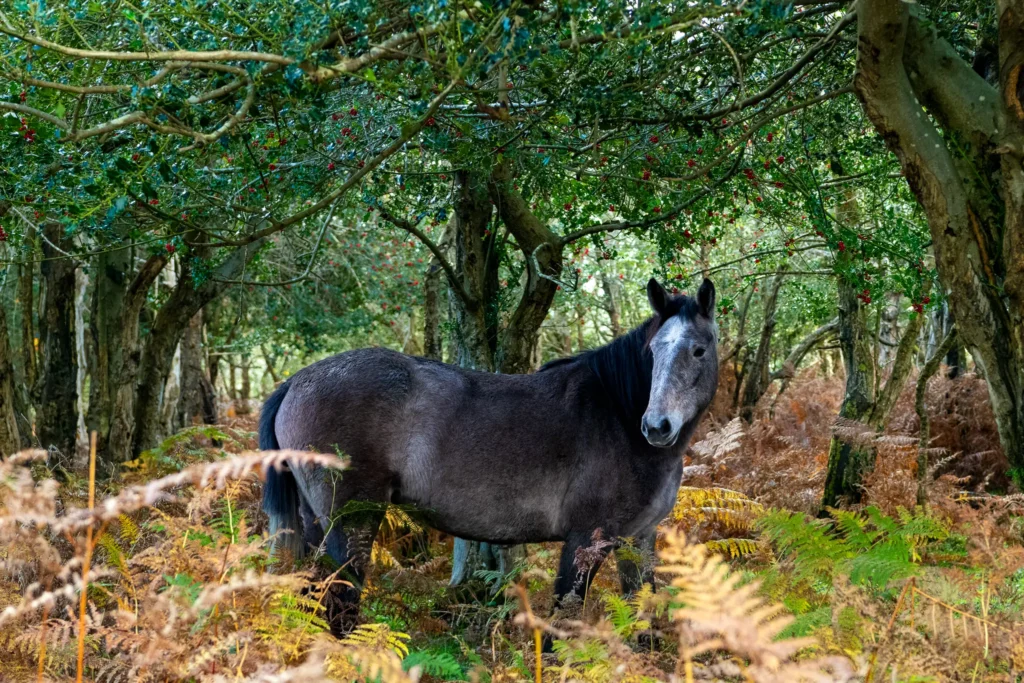
Rather than isolating the subject completely, the busy natural setting tells the story of these animals’ habitat. To make this work:
- Use a telephoto lens: A 70-200mm or longer lens compresses perspective and allows you to maintain a respectful distance from wildlife. Never approach or disturb New Forest animals – a telephoto brings you closer without intruding.
- Moderate aperture for context: While wide apertures create blur, sometimes f/5.6-f/8 provides enough separation while preserving environmental details.
- Wait for eye contact: The horse looking toward the camera creates engagement, transforming a documentary shot into a portrait.
The Knightwood Oak: Photographing an Ancient Legend
Historical Significance
The Knightwood Oak stands as the New Forest’s most famous tree, estimated between 450-600 years old with a trunk girth of 7.38 metres. As a rare example of a pollarded oak – cut about two meters above ground to promote outward branch growth – it represents medieval forest management practices discontinued when the Royal Navy began sourcing straight oak trunks for shipbuilding.
Architectural Photography of Trees
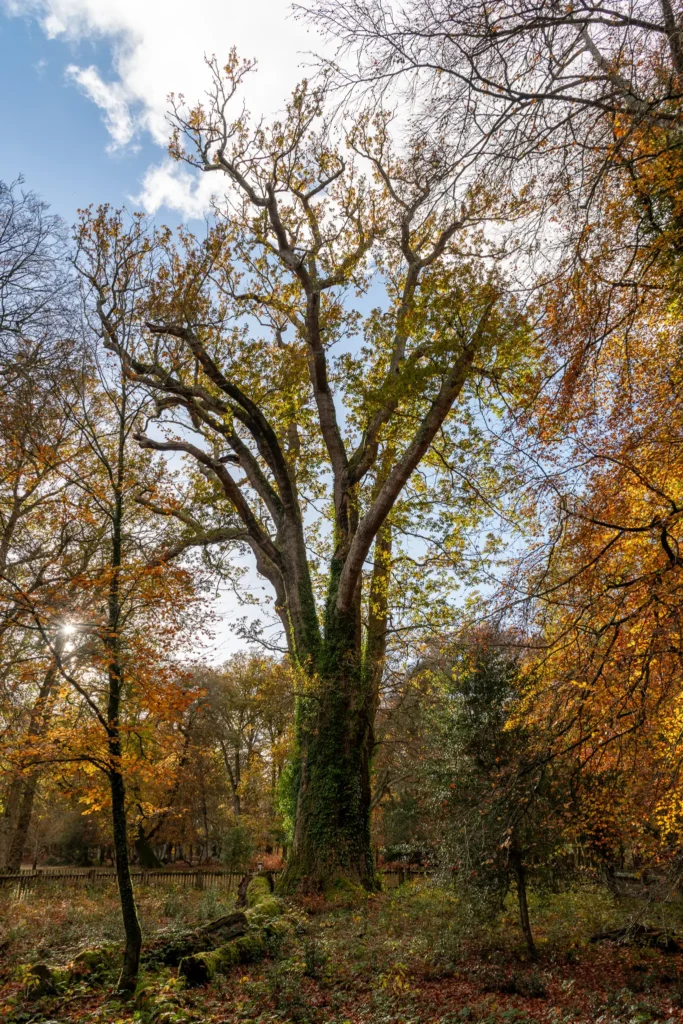
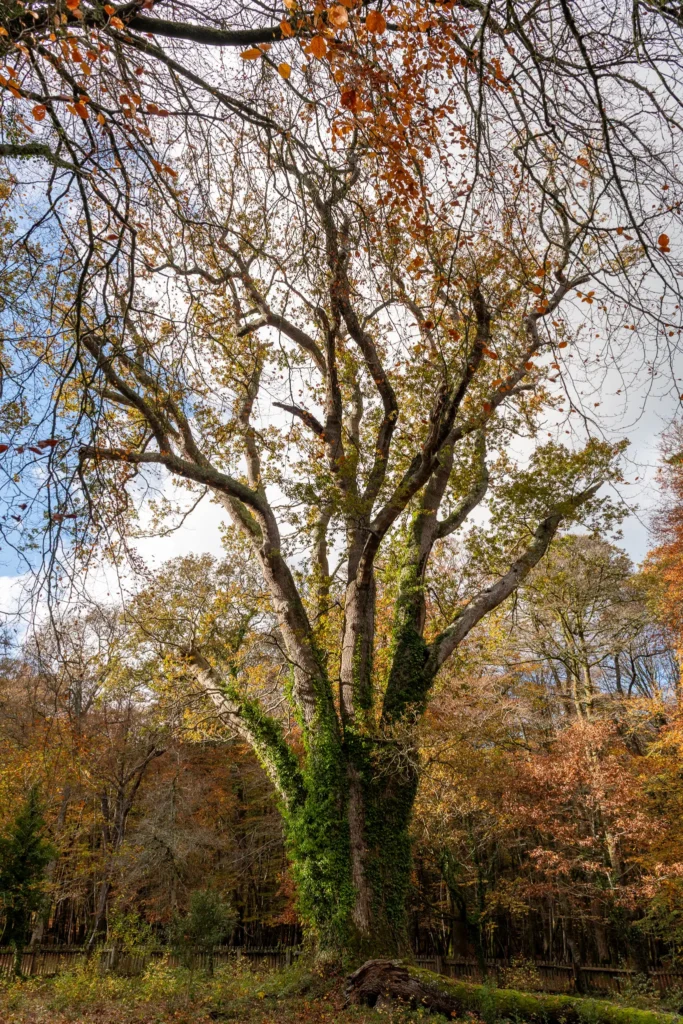
These two photographs present the challenge of photographing large, iconic subjects. These images demonstrate key principles:
Perspective and Focal Length:
The images show the oak from different perspectives – one from ground level emphasizing the massive spreading canopy, another from a lower angle highlighting the complex branch structure against autumn foliage. Varying your perspective is crucial when photographing well-known landmarks.
Technical Considerations:
- Wide-angle lenses (16-35mm) for grandeur: Capturing the entire tree requires wide focal lengths. Getting low and shooting upward emphasizes scale and drama.
- Smaller apertures for sharpness: Use f/8-f/11 to ensure front-to-back sharpness from trunk to distant branches.
- Managing contrast in woodland: Ancient trees often sit in dappled light. Consider shooting during overcast conditions for even lighting that brings out texture without harsh shadows. Alternatively, embrace the contrast during golden hour when warm light enhances autumn colors.
Compositional Tips:
- Include human elements for scale: A person near the tree provides scale reference, helping viewers appreciate its immense size.
- Frame within the environment: Show the fenced enclosure and surrounding forest to provide context rather than isolating the tree completely.
The Unexpected Star: A Friendly Robin
An Extraordinary Encounter
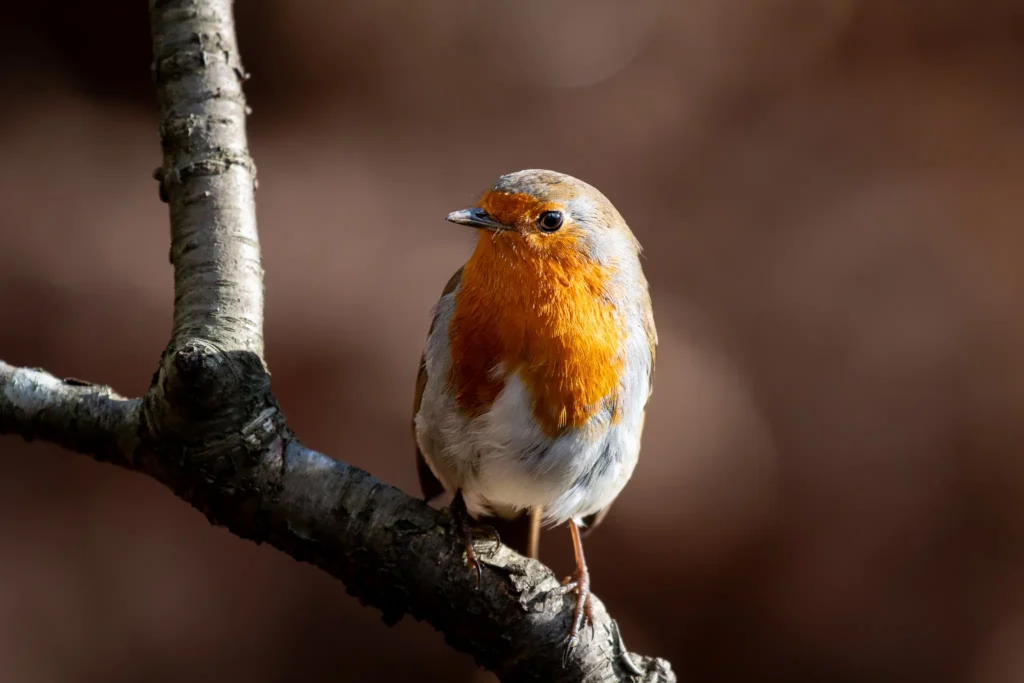
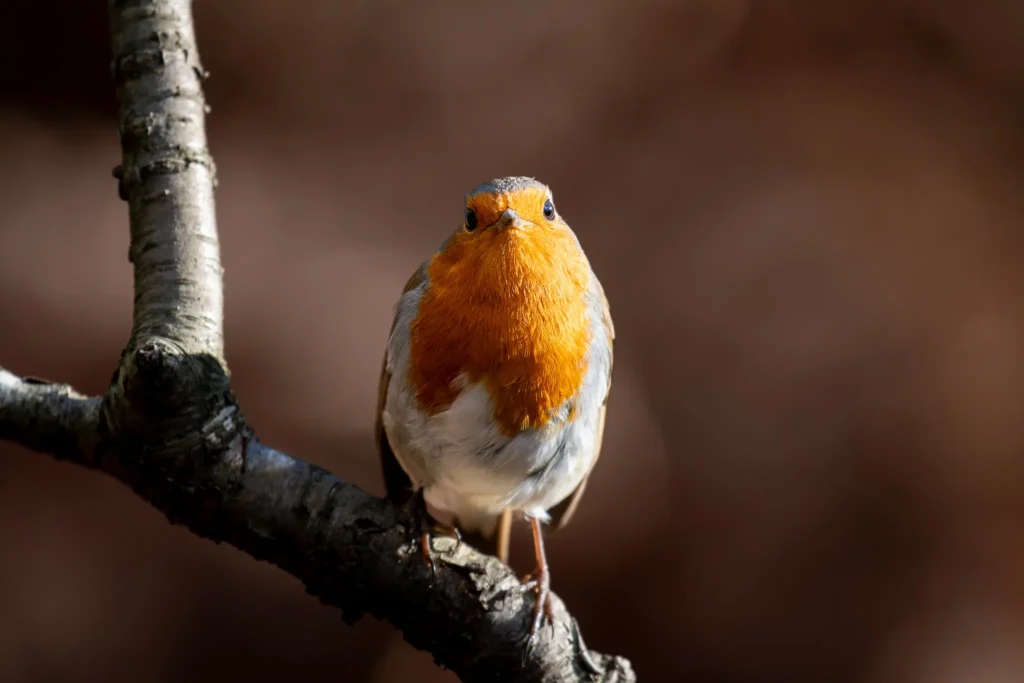
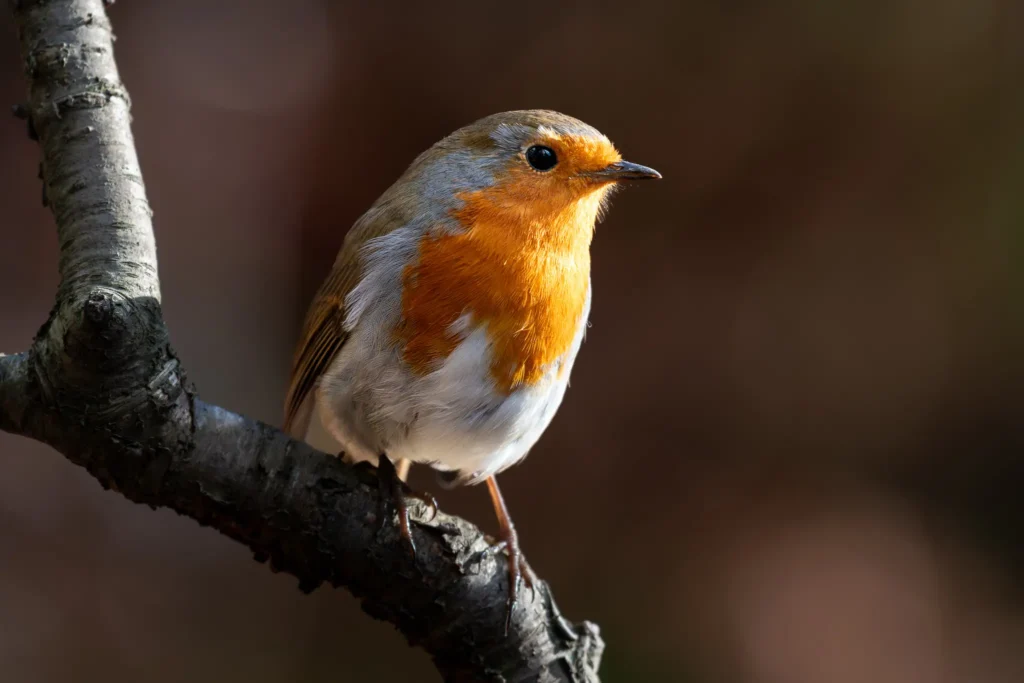
Perhaps the most memorable photography opportunity came from an unexpected source: an exceptionally tame European robin at the Knightwood Oak. These photographs document this delightful subject who cooperated beautifully for close-up portraits.
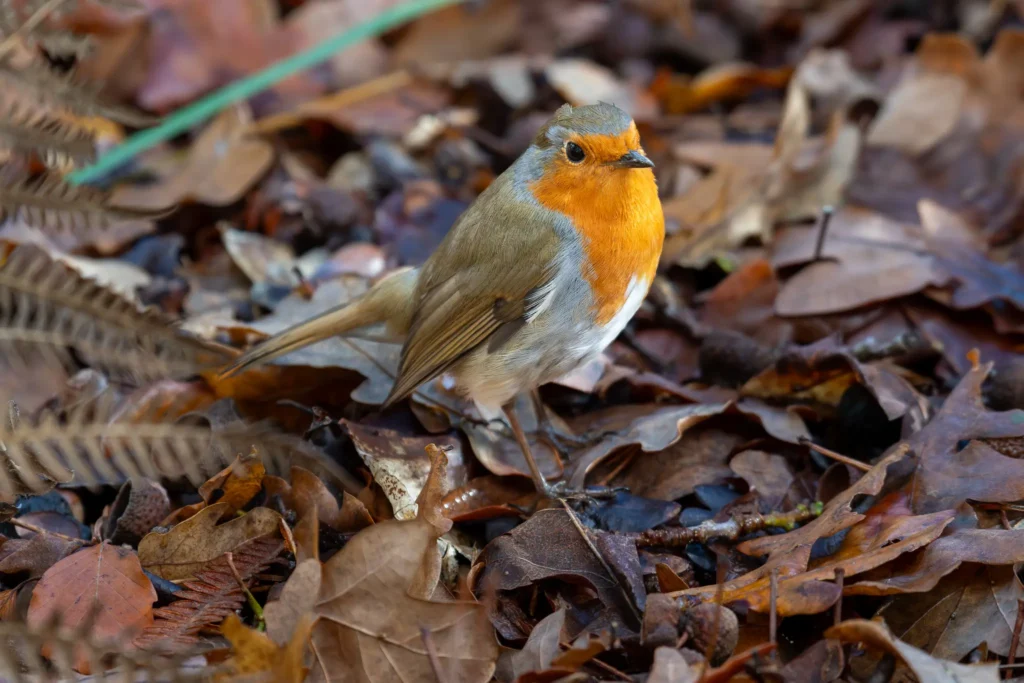
Robin Photography Techniques
Robins, with their bright orange-red breasts and inquisitive personalities, are beloved photographic subjects in Britain. Capturing them successfully requires specific approaches:
Camera Settings for Small Birds:
- Fast shutter speeds: Small birds constantly move, bobbing heads and twitching. Use a minimum 1/500s handheld, preferably 1/1000-1/1500s to freeze motion.
- Wide apertures for separation: f/4-f/5.6 creates beautiful bokeh, isolating the robin from busy woodland backgrounds. However, ensure a sufficient depth of field so that both the eye and tail remain sharp – f/5.6-f/8 provides a good balance.
- Focus on the eye: This fundamental rule of wildlife photography becomes especially crucial when photographing birds. Modern cameras with eye-detection simplify this, but even without, single-point AF placed on the bird’s eye ensures sharpness where it matters.
- Auto-ISO for consistency: In variable woodland light, letting ISO float (capped at your camera’s acceptable noise level) maintains proper exposure while keeping shutter speed and aperture where you need them.
Compositional Approaches:
The last photograph shows a different working distance and perspective:
- Close portrait (first three photgraphs): Getting low and close with a telephoto (200-400mm range recommended) fills the frame while maintaining respectful distance. The soft background blur puts complete attention on the robin’s distinctive features.
- Environmental portrait (final photograph): Pulling back slightly includes more context – the branch, autumn foliage – telling a more complete story while maintaining the robin as the clear subject.
Lighting Considerations:
The warm, soft light in these images exemplifies ideal conditions for robin photography. Side-lighting reveals feather detail and creates dimensionality, while avoiding harsh overhead sunlight prevents unflattering shadows under the bird. Early morning and late afternoon provide this quality light naturally.
The Patient Approach:
This tame robin allowed prolonged observation and multiple compositions – a luxury in bird photography. When you encounter cooperative wildlife, maximize the opportunity by varying your approach, trying different angles, and experimenting with framing. However, always prioritize the animal’s comfort and natural behavior over getting the shot.
Tall Trees Trail at Blackwater Woods: Giants of the Forest
Walking Among Redwoods
The Tall Trees Trail at Blackwater showcases the remarkable Douglas firs and coast redwoods planted in the 1850s to create the Rhinefield Ornamental Drive. This 1.5-mile circular walk features some of Britain’s tallest trees, including giant sequoias (Wellingtonia) that can grow to be the largest living things on Earth.
Photographing Massive Trees
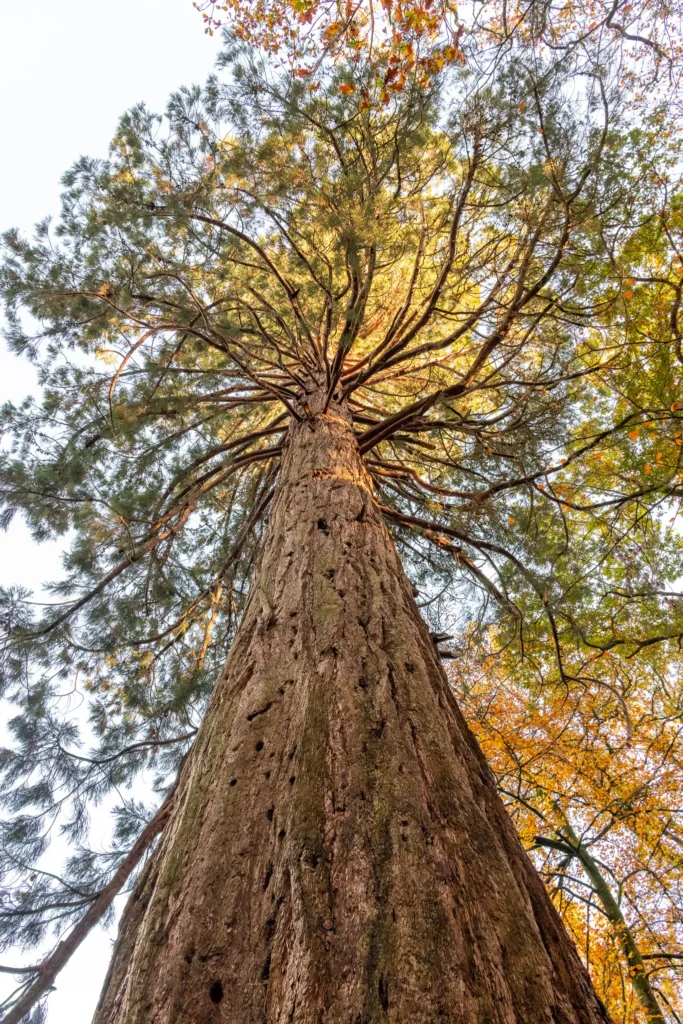
This first photograph captures the immensity of a giant redwood, demonstrating techniques for conveying scale in forest photography:
Perspective and Focal Length:
- Ultra-wide angle perspective: Shot from directly beneath looking up, this perspective emphasizes height dramatically. The converging verticals draw the eye upward along the massive trunk.
- Managing distortion: Wide-angle lenses create natural barrel distortion. Rather than fighting this, embrace it to enhance the sense of towering height. The tree’s trunk curves outward at the bottom, pulling the viewer into the frame.
Exposure and Color:
The autumn foliage surrounding the evergreen redwood creates color contrast – warm golds against cool greens. This complementary color palette adds visual interest beyond the tree itself. The bright patches of sky filtering through represent a classic woodland exposure challenge:
- Expose for mid-tones: Let highlights blow out slightly rather than underexposing the entire scene. The patches of bright sky are acceptable losses when they create that sense of light filtering through the canopy.
- Bracket exposures: In high-contrast woodland scenes, taking multiple exposures (standard, -1 stop, +1 stop) gives you options for blending in post-processing if needed.
Capturing Magical Light
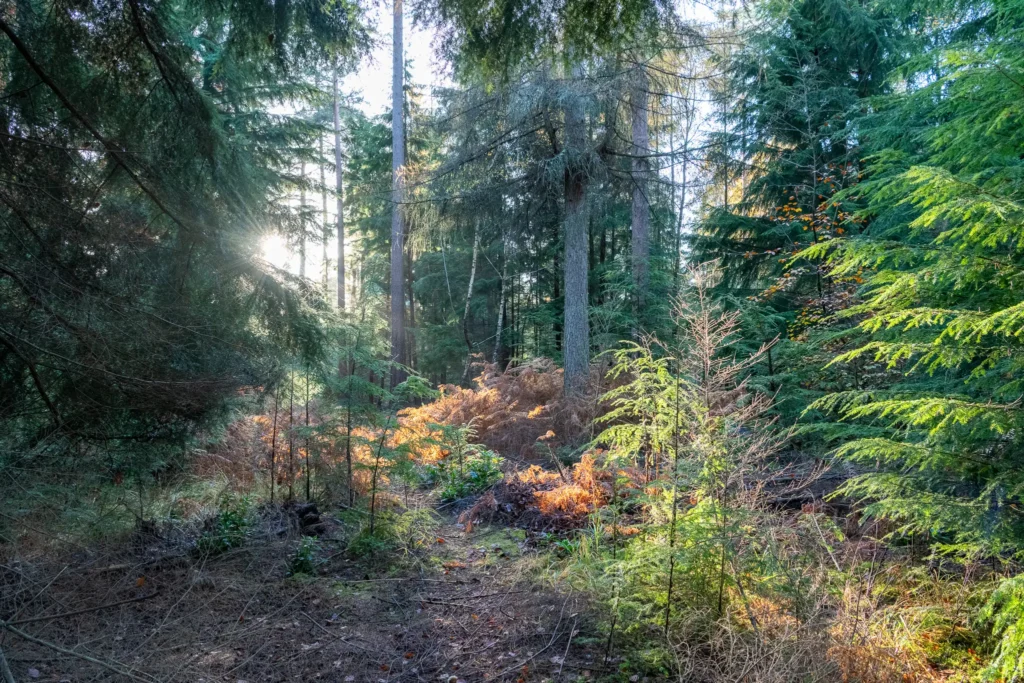
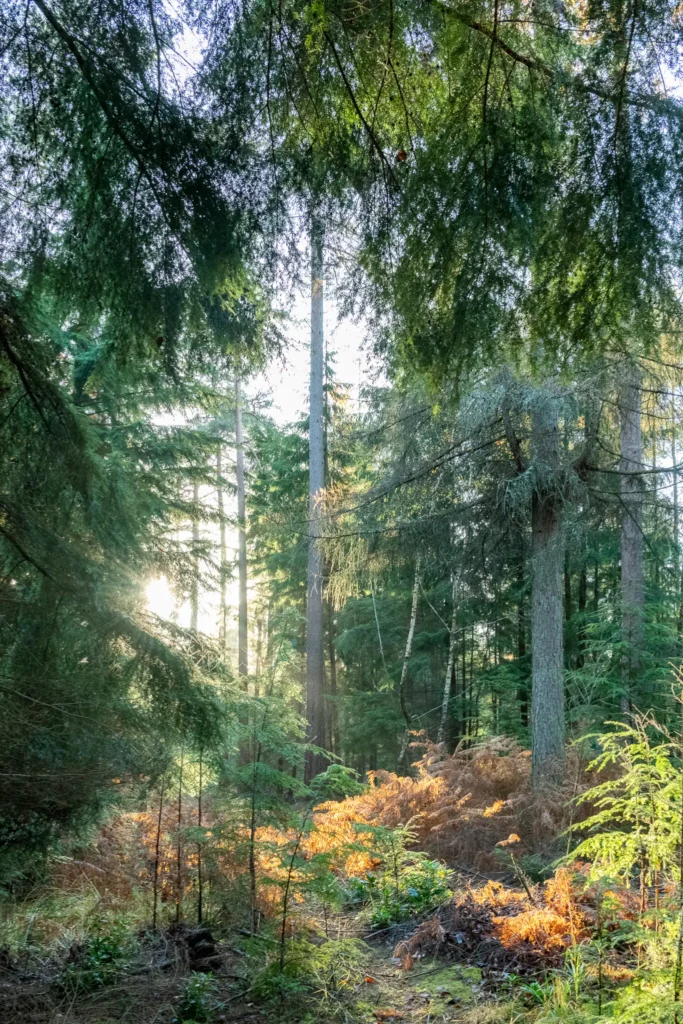
These last photographs represent the essence of autumn woodland photography: golden light streaming through trees. These images demonstrate why serious woodland photographers chase specific lighting conditions.
The “Golden Hour” Advantage:
Later afternoon light, when the sun sits lower in the sky, creates warm, directional illumination that transforms ordinary forest scenes into magical moments:
- Backlighting and sun rays: Position yourself with the sun behind trees to capture those dramatic sunbeams or “god rays” filtering through the canopy. The light diffracts around branches and through gaps, creating visible beams in any mist or atmospheric haze.
- Managing lens flare: Shooting toward the sun risks flare – bright geometric artifacts from light bouncing inside your lens. Use your lens hood, and consider partially blocking the sun with a tree trunk or branch to control flare while maintaining the dramatic lighting effect.
Technical Approach for Light-Through-Trees:
- Spot metering: When bright sunlight dominates part of the scene, switch from matrix/evaluative metering to spot metering. Meter off mid-tone areas (like shadowed bark or forest floor) to prevent the bright light from fooling your camera into underexposing the entire image.
- Slightly underexpose: For dramatic, moody forest scenes with strong backlighting, underexposing by 1/3 to 2/3 stop increases saturation in the autumn colors while preserving that glowing quality in the highlights.
- Narrow aperture for sunstars: If you want those beautiful star-shaped effects where sunlight peeks through gaps, use f/11-f/16. The narrow aperture creates diffraction spikes around point light sources.
Compositional Elements:
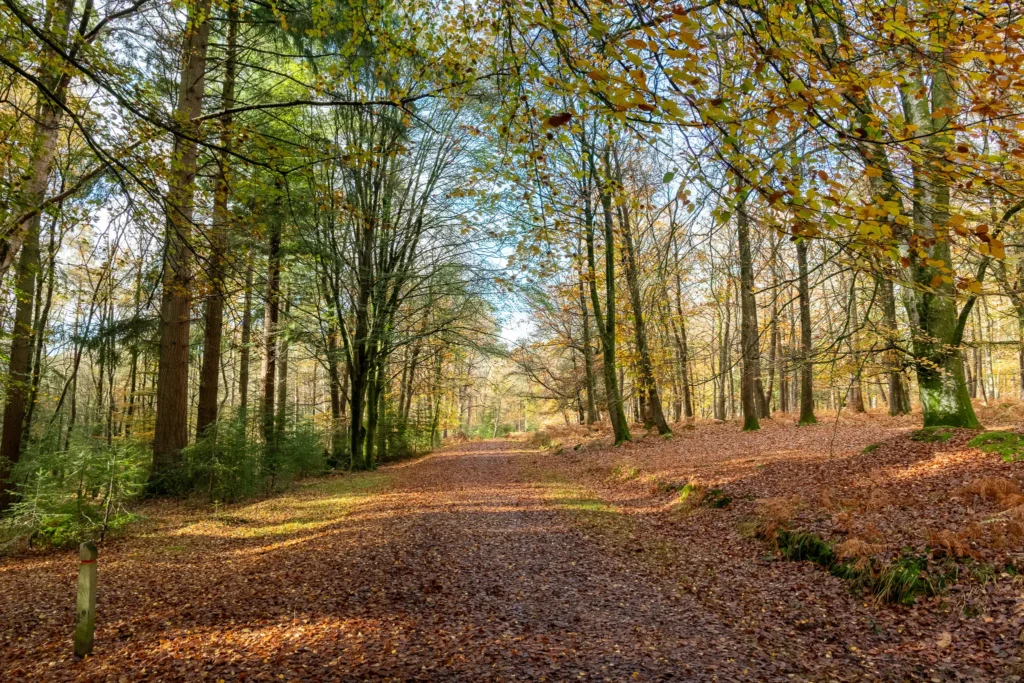
Both images use strong leading lines -the pathway draws the viewer’s eye deep into the scene toward the source of light. The layered depth (foreground path, midground trees, background light) creates dimensionality that prevents the forest from feeling flat or two-dimensional.
The Color Palette:
The mixture of golden autumn bracken, green evergreens, and warm sunset light creates a rich, saturated color palette characteristic of autumn. The slightly blue sky peeking through provides cool color contrast against the warm tones dominating the scene.
Essential Photography Tips and Techniques Summary
Technical Settings for Forest and Wildlife Photography
Wildlife (Ponies, Deer, Birds):
- Shutter speed: 1/1000s minimum for moving animals, 1/1500s for bird.
- Aperture: f/5.6-f/8 for animals in context, f/4-f/5.6 for isolated portraits.
- Focus: Continuous AF (AF-C/AI Servo), single-point or dynamic area on subject’s eye.
- ISO: Auto-ISO capped at an acceptable noise level for your camera.
Landscape and Woodland Scenes:
- Aperture: f/8-f/11 for front-to-back sharpness.
- Shutter speed: Use tripod for sharp images in low light.
- ISO: Keep as low as possible (100-400) for maximum quality.
- Focus: Use single-shot AF or manual focus on foreground interest.
Close-up/Macro (Berries, Details):
- Aperture: f/2.8-f/5.6 for subject isolation.
- Focus: Manual or single-point AF, precise focus critical.
- Consider: Tripod for stability, remote release to avoid camera shake.
Lighting Strategies
Golden Hour (Early Morning/Late Afternoon):
Best for warm, directional light that enhances autumn colors and creates long shadow.
Overcast Conditions:
Ideal for even lighting without harsh contrast, excellent for detail and color saturation.
Backlighting:
Creates rim-light effects, illuminates translucent leaves, and adds drama – watch for lens flare.
Side-lighting:
Reveals texture and detail, creates dimensionality in subjects.
Compositional Principles
- Rule of thirds: Place key elements off-center for dynamic compositions
- Leading lines: Use paths, streams, or tree lines to guide the viewer’s eye
- Layering: Create depth with foreground, midground, and background elements
- Frame within frame: Use branches, gaps in trees to frame your subject
- Vary perspective: Shoot from low angles, high vantage points, close and far
Ethical Wildlife Photography
The New Forest’s animals are protected, and their welfare must always come first:
- Maintain respectful distance: Use telephoto lenses (200mm+) rather than approaching closely
- Never feed or touch animals: This alters natural behavior and can be dangerous
- Watch for stress signals: If animals appear agitated, retreat immediately
- Stay on designated paths: Protect fragile habitats and nesting areas
- No flash photography: This disturbs and stresses wildlife
Lessons Learned and Final Thoughts
This New Forest adventure reinforced fundamental photography principles while presenting unique challenges. The most important lessons:
Patience Rewards the Prepared: While we didn’t find deer in the sanctuary, the surrounding areas provided wonderful alternatives. Being ready with proper camera settings meant we could capture galloping ponies and that tongue-out moment without fumbling with dials.
Light Makes the Image: The golden hour light streaming through Blackwater Woods elevated simple forest scenes into something magical. Knowing when and where to shoot matters as much as technical skill.
Respect Your Subjects: The friendly robin at Knightwood Oak was a gift, but even with cooperative wildlife, patience and respect created the best images. Rushing or stressing animals never produces genuine moments.
Technical Knowledge Frees Creativity: Understanding exposure, focus, and compositional principles meant I could respond instinctively to opportunities rather than stopping to figure out settings. Master the technical fundamentals so they become second nature.
Every Location Offers Multiple Stories: From grand landscapes to intimate macro details, from action shots to quiet portraits, each location provided diverse photographic opportunities. Training yourself to see at different scales, from wide vistas to tiny details, enriches your photography.
The New Forest remains a photographer’s paradise, offering ancient woodlands, charismatic wildlife, and ever-changing light throughout the seasons. Whether you’re capturing the grandeur of 600-year-old oaks, the personality of free-roaming ponies, or the magic of sunset light filtering through redwoods, this unique landscape challenges and inspires photographers at every skill level.